Bootstrap Header Working
Overview
Like in set documents the header is just one of the highly significant elements of the website pages we obtain and create to operate every day. It securely possesses the absolute most essential related information relating to the identity of the organisation as well as individual responsible for the page in itself and the essence of the entire website-- its navigation structure which in addition to the Bootstrap Header Form itself should really be thought and made in this kind of technique that a site visitor rushing or not really actually understanding which way to see just take a peek at plus find the required information. This is the most suitable circumstance-- in the real world making as near as attainable to this appearance and behavior also goes since we practically every moment have some project particular restrictions to look at. Also in contrast to the written paperworks around the world of cyberspace we should always bear in mind the assortment of possible devices on which our pages could potentially get showcased-- we should guarantee their responsive activity or else to puts it simply-- make certain they will present best at any monitor size achievable.
So let us have a glance and check out ways a navbar gets produced in Bootstrap 4. (see page)
How to apply the Bootstrap Header Code:
First off to create a page header or else considering that it gets pertained to in the framework-- a navbar-- we require to wrap the entire thing inside a
<nav>.navbar.navbar-toggleable- ~ screen size ~.bg-*.navbar-light.navbar-lightWithin of this parent component we should begin by positioning a switch feature which in turn shall certainly be operated to feature the collapsed content on a smaller screen dimensions-- to achieve that make a
<button>.navbar-toggler.navbar-toggler-left.navbar-toggler-righttype = " button "data-toggle ="collapse"data-target = " ~ the collapse element ID ~What is definitely bright new for current alpha 6 release of the Bootstrap 4 framework is that inside the
.navbar-togler<span>.navbar-toggler-icon<a>.navbar-brand<div class="img"><img></div>Now-- the critical part-- designing the collapsible container for the primary site navigation-- to perform it build an element utilizing the
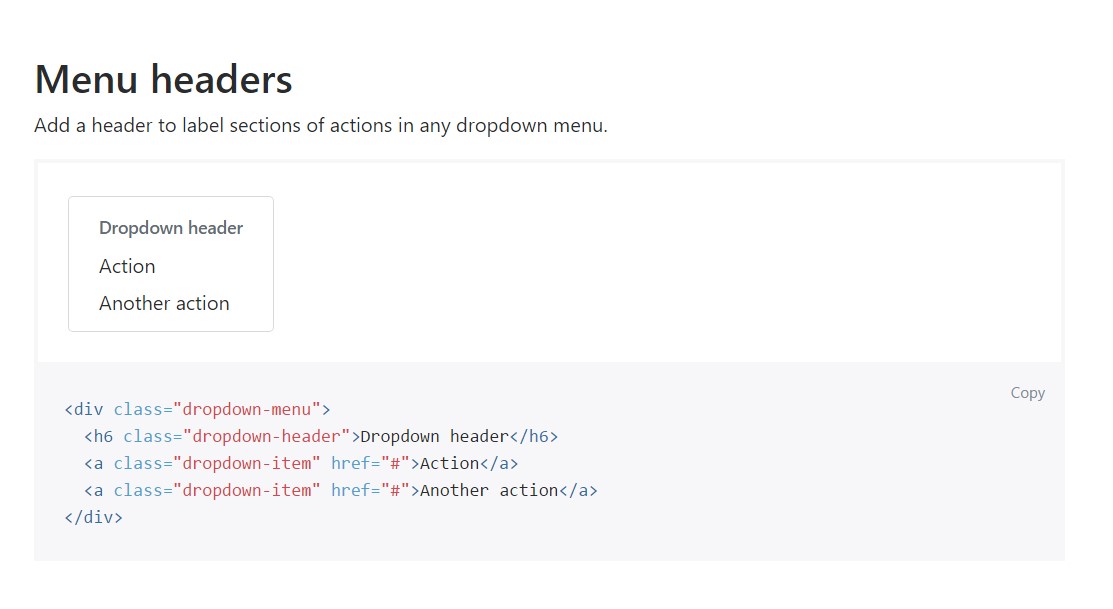
.collapse.navbar-collapseid =" ~ same as navbar toggler data-target ~ ".collapse<ul>.navbar-nav<ul><li>.nav-item<a>.nav-link.nav-item.nav-link.nav-item.dropdown<li>.dropdown-toggle.nav-link.nav-item<div>.dropdown-menu.dropdown-itemSome example of menu headers
Put in a header to label areas of actions into any dropdown menu.
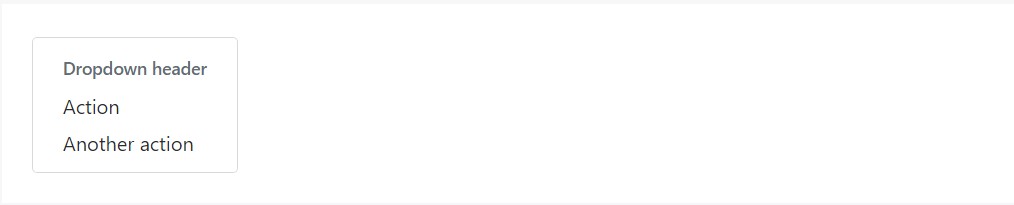
<div class="dropdown-menu">
  <h6 class="dropdown-header">Dropdown header</h6>
  <a class="dropdown-item" href="#">Action</a>
  <a class="dropdown-item" href="#">Another action</a>
</div>
extra capabilities
An additional brand new thing for this particular edition is the possibility to fit an inline forms in your
.navbar.form-inline<span>.navbar-textConclusions
Whenever it comes down to the header items in newest Bootstrap 4 version this is being actually taken care of with the built in Collapse plugin and several site navigation certain information classes-- a number of them produced particularly for preventing your label's identity and various other-- to get confident the real webpage navigational structure will show best collapsing in a mobile style menu when a defined viewport width is achieved.
Review a number of video clip training relating to Bootstrap Header
Related topics:
Bootstrap Header: approved records
Bootstrap Header training
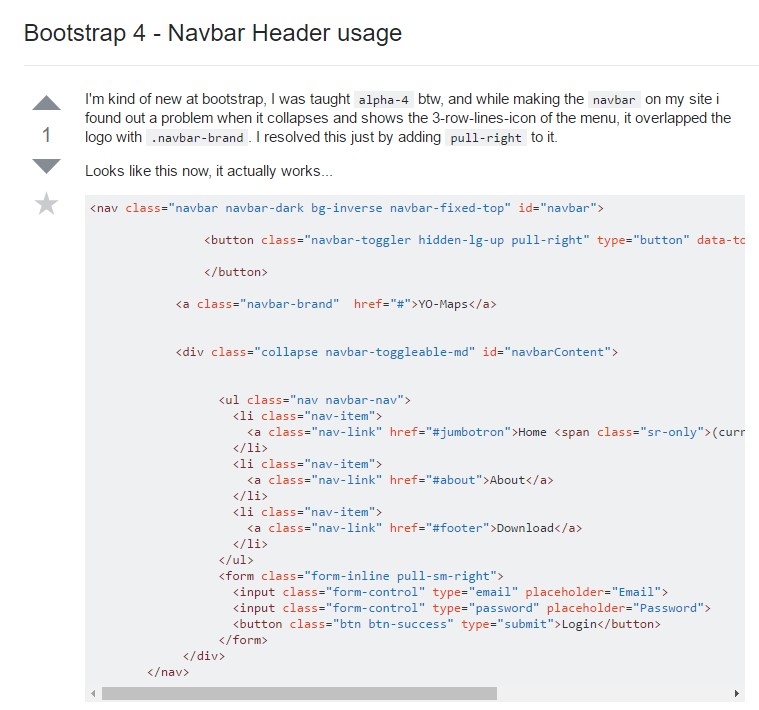
Bootstrap 4 - Navbar Header usage