Bootstrap Checkbox HTML
Introduction
In some cases the easiest features might actually become extremely required-- most especially as you get to need them. For example precisely how do your site visitors interact with the webpages you set up specifying a basic Boolean act-- just yes or no pertaining to a couple of the issues you should request, exactly how they do approve the conditions and terms or else line up a handful of the achievable preferences they might have. We often surpass this with no paying much of an recognition to the element liable for these sorts of actions however the Bootstrap Checkbox Toggle is certainly a quite critical component-- one our forms just can't actually perform without.
Inside the most updated fourth version of the Bootstrap framework we are presented with the
.form-check.form-check-label<div>.form-check.form-check-label<label><input>.form-check-inputThe best ways to work with the Bootstrap checkbox:
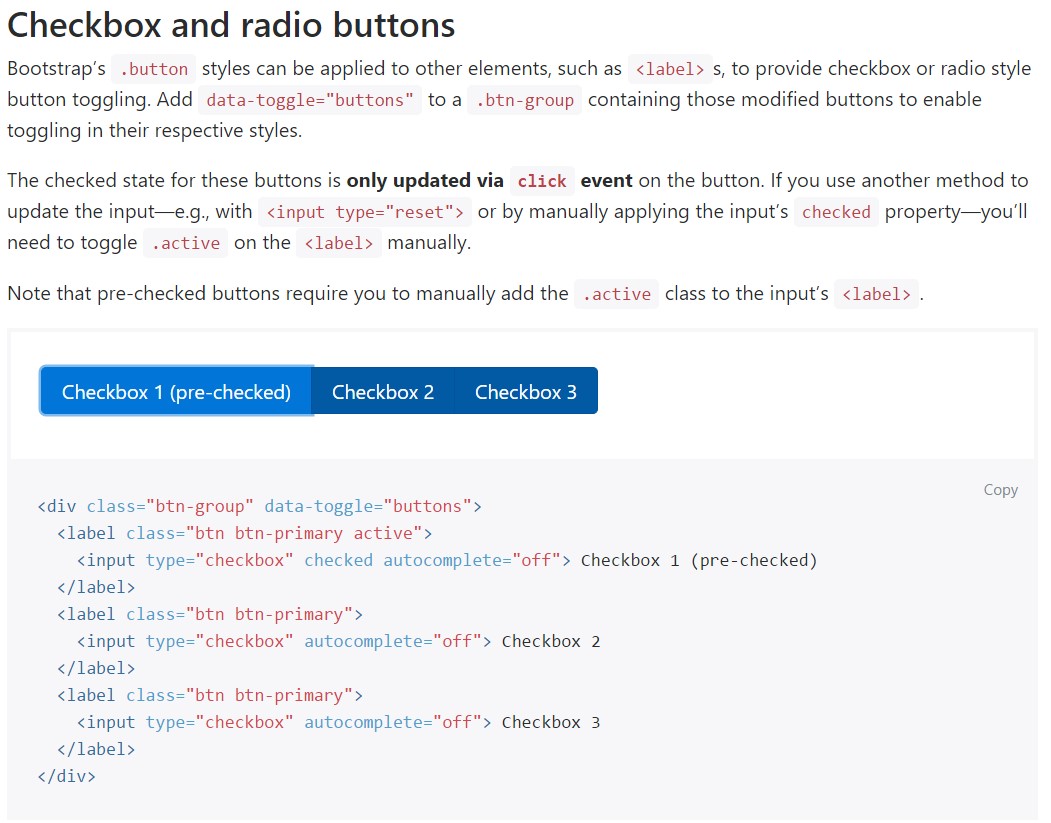
Bootstrap's
.button<label>data-toggle=" buttons".btn-group
<div class="btn-group" data-toggle="buttons">
  <label class="btn btn-primary active">
    <input type="checkbox" checked autocomplete="off"> Checkbox 1 (pre-checked)
  </label>
  <label class="btn btn-primary">
    <input type="checkbox" autocomplete="off"> Checkbox 2
  </label>
  <label class="btn btn-primary">
    <input type="checkbox" autocomplete="off"> Checkbox 3
  </label>
</div>
In some cases we really need the checkboxes to be in our forms without the site visitor really being capable to take any action clicking on them-- that is simply where the disabled option arrives in.
In order to disable efficiently a checkbox in Bootstrap 4 employing the common HTML attribute
disabledIn case you appreciate the tip and really desire to carry this out you should assign the
.disabled.form-checkYet another example
Anytime you are using checkboxes, wrap them in a
<label>.custom-control.custom-checkboxWork with
.custom-control-input<input>Also utilize two
<span>.custom-control-indicator.custom-control-description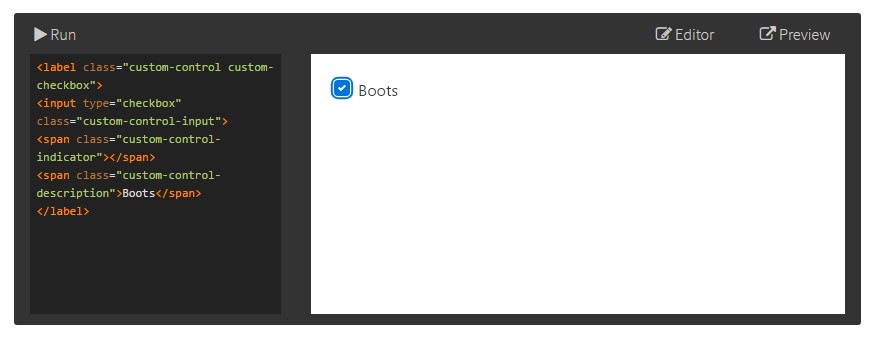
<label class="custom-control custom-checkbox">
<input type="checkbox" class="custom-control-input">
<span class="custom-control-indicator"></span>
<span class="custom-control-description">Boots</span>
</label>
Bootstrap Checkbox Example forms
Default radios and checkboxes are raised upon with the help of
.form-checkThe disabled class is going to also light up the text colour to help specify the input's state.
A fresh detail for the Bootstrap version 4 system is the launch of the so called custom-made form elements. These are actually the similar components we are known in capability yet designated much more attractive and also in the Bootstrap means. Utilizing them you can absolutely provide fascinating taste as well as style to your material via simply just appointing a handful of extra classes to the controls you feature in your forms.
If you want to utilize customized checkboxes wrap them in a
<label>.custom-control.custom-checkbox<input>.custom-control-input<span>.custom-control-indicator.custom-control-descriptionConclusions
That's pretty much all that you require to perform in order to place a checkbox element for your Bootstrap 4 powered website and add in certain customized flavor to it bring in it a beautiful appeals. And now everything you ought to do is repeat the exercise until you have actually inspected every one of the checkboxes required are currently on the web page.
Look at several on-line video short training relating to Bootstrap checkbox
Connected topics:
Bootstrap checkbox authoritative information
Centering checkbox buttons in Bootstrap 4 row

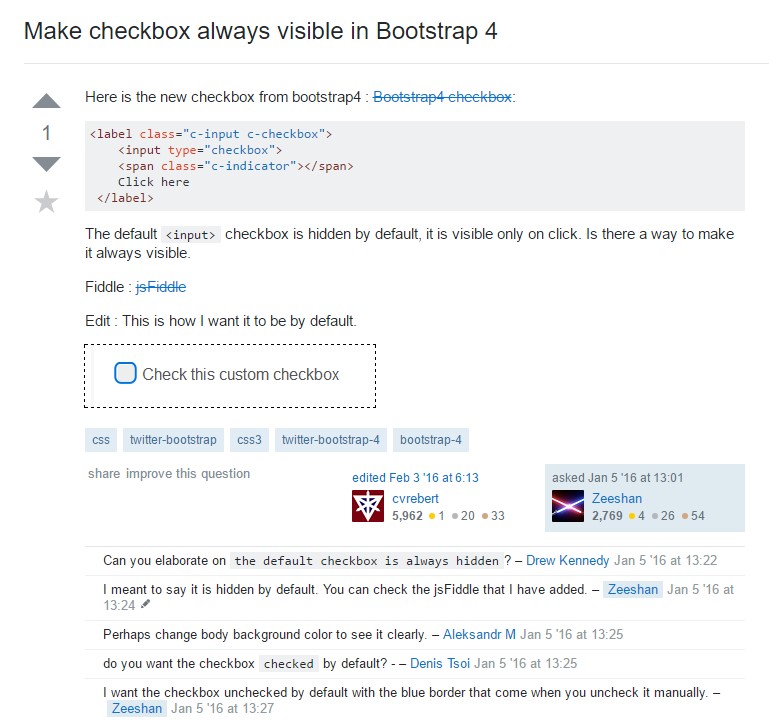
Make checkbox always visible in Bootstrap 4